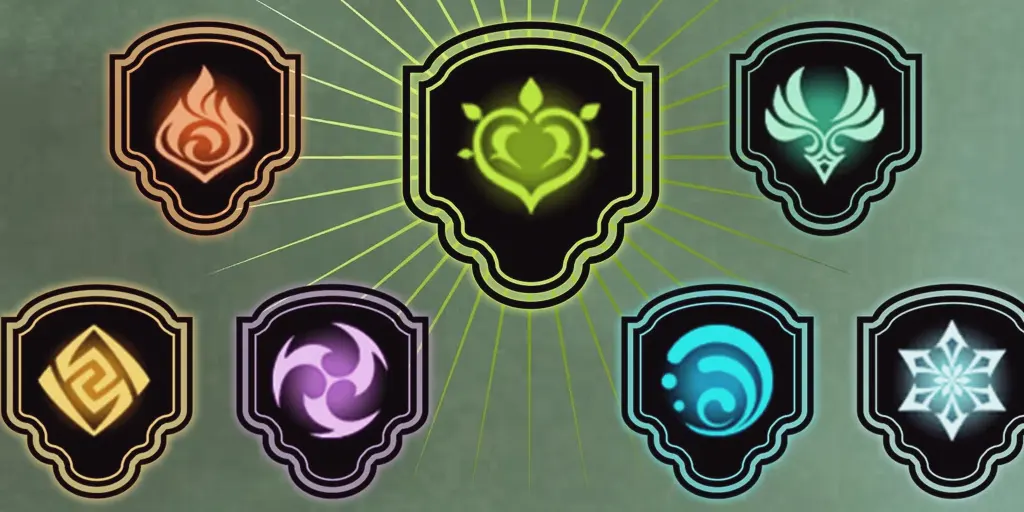
Genshin Impact, the popular action RPG by HoYoverse, offers a vast world with intricate gameplay mechanics, including a unique elemental reaction system.
With the introduction of the Sumeru region in Version 3.0, Dendro became a major element, bringing new elemental reactions into the mix.
These reactions add depth to combat andstrategy, allowing players to create diverse team compositions and unleash powerful damage combinations.
Dendro reactions can be complex, with different triggers, damage types, and scaling factors. This guide will dive into each reaction, explaining how they work, their damage output, and how players can make the most out of Dendro-based teams.
Whether you’re exploring Sumeru for the first time or refining your combat strategy, this comprehensive guide will provide all the information you need to master Dendro reactions.
Understanding Dendro Reactions

Dendro reactions in “Genshin Impact” open a new world of elemental combinations, offering unique combat opportunities.
The Dendro element interacts with Pyro, Hydro, and Electro to create a variety of effects, each with its mechanics and damage profiles.
Let’s explore each reaction in detail to understand how they work and how they can be used in combat strategies.
Burning
Trigger: Dendro + Pyro
Damage Type: Pyro
Does it Crit?: No
Burning is one of the most straightforward Dendro reactions, triggered when Dendro meets Pyro. This reaction creates a persistent Pyro aura that deals ongoing damage to enemies.
Although the damage is relatively minor compared to other reactions, it can be useful for maintaining a steady source of damage over time.
Here’s a breakdown of the damagemultiplier and scaling:
- Damage Multiplier: 0.25x
- Base Damage (Level 90, 0 Elemental Mastery): 361
- Scaling: Affected by Elemental Mastery and enemy resistance
While Burning doesn’t crit, it can be a useful setup for other reactions like Vaporize and Melt. However, be aware that if these reactions use the Pyro aura, the Burning damage will disappear.
The following table shows the estimated Burning damage at different Elemental Mastery levels:
| Elemental Mastery | Burning Damage |
|---|---|
| 0 | 361 |
| 50 | 503 |
| 100 | 637 |
| 200 | 888 |
| 300 | 1116 |
| 400 | 1326 |
| 500 | 1519 |
| 600 | 1697 |
| 700 | 1862 |
| 800 | 2015 |
| 900 | 2157 |
| 1000 | 2290 |
Despite its simplicity, Burning can be a useful reaction to maintain constant Pyro damage, especially when combined with other reactions.
Bloom
Trigger: Dendro + Hydro
Damage Type: Dendro
Does it Crit?: No
Bloom is a Dendro reaction in “Genshin Impact” triggered when Dendro meets Hydro. This reaction generates Dendro Cores that fall to the ground and explode after a few seconds, causing AoE (Area of Effect) damage.
Bloom’s core explosions have significant potential to damage multiple enemies, making it an effective tool for crowd control.
However, there’s a caveat: these Dendro Cores can also harm the active character if they are within the explosion radius.
Although the damage received is significantly reduced, it’s still something to be cautious of when positioning your characters in battle.
The damage multiplier for Bloom is 2x, which is the same as the Overloaded reaction. The following table shows how the Bloom damage scales with Elemental Mastery, assuming a Level 90 character:
| Elemental Mastery | Bloom Damage |
|---|---|
| 0 | 2893 |
| 50 | 4022 |
| 100 | 5097 |
| 200 | 7101 |
| 300 | 8930 |
| 400 | 10607 |
| 500 | 12150 |
| 600 | 13574 |
| 700 | 14893 |
| 800 | 16117 |
| 900 | 17257 |
| 1000 | 18321 |
Bloom reactions are excellent for large groups of enemies due to the AoE damage, but they require careful handling to avoid self-damage.
If managed properly, Bloom can be a powerful tool for quickly clearing waves of enemies, especially in Spiral Abyss and other challenging scenarios.
Hyperbloom
Trigger: Bloom + Electro
Damage Type: Dendro
Does it Crit?: No
Hyperbloom is a more advanced Dendro reaction in “Genshin Impact,” created when Electro interacts with Bloom’s Dendro Cores.
This reaction transforms the cores into homing projectiles that fly toward enemies, dealing single-target Dendro damage.
Hyperbloom is unique because it turns an AoE effect into targeted damage, offering high precision for taking down specific foes.
With a 3x damage multiplier, Hyperbloom packs a stronger punch compared to Bloom, making it ideal for focused attacks on high-priority targets.
Here’s a breakdown of Hyperbloom damage scaling with Elemental Mastery at Level 90:
| Elemental Mastery | Hyperbloom Damage |
|---|---|
| 0 | 4339 |
| 50 | 6033 |
| 100 | 7645 |
| 200 | 10651 |
| 300 | 13395 |
| 400 | 15911 |
| 500 | 18225 |
| 600 | 20361 |
| 700 | 22339 |
| 800 | 24176 |
| 900 | 25886 |
| 1000 | 27482 |
Hyperbloom is an excellent choice for players who prefer single-target attacks and focused damage. The homing aspect of Hyperbloom makes it particularly useful in combat scenarios where precision is key.
To optimize this reaction, consider pairing Electro characters with Dendro-based teams to trigger Hyperbloom effectively.
When using Hyperbloom, ensure your team has sufficient Electro applications to keep the reaction going, especially during intense battles. This reaction can be especially useful in boss fights and against elite enemies where single-target damage is crucial.
Burgeon
Trigger: Bloom + Pyro
Damage Type: Dendro
Does it Crit?: No
Burgeon is another second-stage Dendro reaction in “Genshin Impact.” It is triggered when Pyro meets the Dendro Cores generated by Bloom.
Unlike Hyperbloom, which focuses on single-target damage, Burgeon creates a large AoE explosion, dealing Dendro damage to all nearby enemies.
This makes it an excellent choice for clearing groups of enemies or causing widespread damage in combat.
With a 3x damage multiplier, Burgeon matches Hyperbloom’s power but in a broader area. This reaction is especially useful in scenarios where you need to control enemy hordes or quickly reduce the health of multiple foes at once.
Here’s how the damage scales with Elemental Mastery at Level 90:
| Elemental Mastery | Burgeon Damage |
|---|---|
| 0 | 4339 |
| 50 | 6033 |
| 100 | 7645 |
| 200 | 10651 |
| 300 | 13395 |
| 400 | 15911 |
| 500 | 18225 |
| 600 | 20361 |
| 700 | 22339 |
| 800 | 24176 |
| 900 | 25886 |
| 1000 | 27482 |
One important thing to note with Burgeon is that it can also damage your active character if they’re within the explosion’s range. While the damage is significantly reduced, it’s essential to position your characters carefully to avoid unnecessary damage.
Burgeon can be a key part of your strategy when facing large groups of enemies or when crowd control is necessary.
To get the most out of Burgeon, ensure you have sufficient Pyro application in your team to trigger this reaction regularly. Characters like Xiangling and Bennett can be excellent choices for this purpose.
Quicken
Trigger: Dendro + Electro
Damage Type: None
Does it Crit?: No
Quicken is a unique Dendro reaction in “Genshin Impact” because it doesn’t deal direct damage. Instead, it serves as a debuff, creating a state that allows other reactions like Aggravate and Spread.
When Dendro and Electro meet, the target receives a Quicken aura, which lasts for about 8 seconds, enabling players to trigger other powerful reactions without reapplying the base elements.
This makes Quicken the starting point for various strategic setups in combat.
Despite its lack of direct damage, Quicken is crucial for enabling other reactions. Here’s why it’s essential:
- Stage Setting: Quicken sets the stage for Aggravate and Spread, two critical reactions for increasing damage output.
- Reaction Preservation: Once a target is under the Quicken effect, you don’t need to reapply Dendro or Electro to maintain the reaction.
- Flexible Strategy: Since Quicken doesn’t interact with Cryo, Anemo, or Geo, it offers flexibility in team compositions and reactions.
However, there are some limitations to Quicken. This reaction is disrupted by Pyro and, to a lesser extent, Hydro. Hydro might leave a small space for Quicken to trigger, but Pyro tends to remove it completely.
This means that if your team setup includes Pyro, you need to be careful about where and when you use it.
Quicken is particularly useful for building damage with Aggravate and Spread. With careful management, you can maintain the Quicken state long enough to trigger multiple reactions, maximizing your team’s damage output.
Related Post: Arlecchino’s Debut and 4-Star Characters
Aggravate
Trigger: Quicken + Electro
Damage Type: Electro
Does it Crit?: Yes
Aggravate is an Electro-based reaction in “Genshin Impact” that emerges from the Quicken state. Once a target is under the Quicken effect, applying Electro triggers Aggravate, adding a flat damage bonus to all subsequent Electro attacks on that target.
Unlike other elemental reactions, Aggravate doesn’t multiply existing damage; instead, it provides an additive boost, which can significantly enhance Electro damage.
One notable aspect of Aggravate is that it can crit, making it a powerful tool for Electro-based characters to increase their damage output. Here’s what makes Aggravate unique:
- Flat Damage Bonus: Aggravate provides a consistent boost to Electro attacks, allowing for steady damage output.
- Critical Hits: Since Aggravate can crit, it has a higher potential for burst damage, especially when combined with high Critical Damage stats.
- Synergy with Electro Characters: Aggravate is particularly effective when used with characters like Fischl, Keqing, and Yae Miko, who can quickly apply Electro to maintain the reaction.
To better understand the scaling of Aggravate, consider the following table, showing how the flat damage bonus varies with Elemental Mastery at Level 90:
| Elemental Mastery | Aggravate Damage Bonus |
|---|---|
| 0 | 1663 |
| 50 | 1996 |
| 100 | 2303 |
| 200 | 2852 |
| 300 | 3327 |
| 400 | 3743 |
| 500 | 4110 |
| 600 | 4436 |
| 700 | 4727 |
| 800 | 4990 |
| 900 | 5228 |
| 1000 | 5444 |
Aggravate can be a key factor in building high Electro damage teams, offering a consistent and reliable way to boost output.
To maximize its potential, ensure you have a steady supply of Electro application and keep an eye on the Quicken state to maintain Aggravate’s effectiveness.
Spread
Trigger: Quicken + Dendro
Damage Type: Dendro
Does it Crit?: Yes
Spread is a Dendro reaction in “Genshin Impact” that follows from the Quicken state. Once a target has the Quicken aura, applying Dendro will trigger Spread, similar to how Aggravate functions with Electro.
Spread adds a flat damage bonus to Dendro-based attacks, with a higher multiplier than Aggravate, making it a key reaction for increasing Dendro damage output.
Spread has several unique characteristics that distinguish it from other reactions:
- High Damage Multiplier: With a 1.25x multiplier, Spread provides a significant boost to Dendro damage, allowing for considerable damage increases.
- Critical Hit Potential: Like Aggravate, Spread can crit, enabling high burst damage when combined with characters who have strong Critical Damage stats.
- Synergy with Dendro Characters: Spread works well with Dendro-based teams, allowing characters like Tighnari and Nahida to benefit from increased damage output.
Here’s a table showing how the flat damage bonus from Spread scales with Elemental Mastery at Level 90:
| Elemental Mastery | Spread Damage Bonus |
|---|---|
| 0 | 1808 |
| 50 | 2170 |
| 100 | 2503 |
| 200 | 3099 |
| 300 | 3616 |
| 400 | 4068 |
| 500 | 4467 |
| 600 | 4821 |
| 700 | 5139 |
| 800 | 5424 |
| 900 | 5682 |
| 1000 | 5917 |
Spread is a valuable reaction for players looking to boost their Dendro-based damage. To get the most out of this reaction, ensure you have a reliable source of Dendro application and keep track of the Quicken state to maintain Spread’s effectiveness.
Spread is particularly useful when fighting groups of enemies or in situations where Dendro characters can maintain consistent damage output. Combine Spread with characters who have high Elemental Mastery for maximum damage bonuses.
Best Practices for Dendro Reactions

Understanding Dendro reactions in “Genshin Impact” is only part of the journey. To fully maximize the benefits of these reactions, you need to build optimal team compositions, manage Elemental Mastery, and consider other strategic factors.
Here are some best practices for using Dendro reactions effectively.
Optimal Team Compositions
Building a balanced team is key to maximizing Dendro reactions. Here are some tips for creating optimal compositions:
- Dendro and Elemental Balance: Include at least one Dendro character and a combination of Pyro, Hydro, and Electro characters to trigger various Dendro reactions.
- Electro Characters for Aggravate: Use characters like Fischl, Keqing, or Yae Miko to maintain a steady supply of Electro for triggering Aggravate.
- Pyro Characters for Burgeon and Burning: Xiangling and Bennett are excellent choices for consistent Pyro application, supporting Burgeon and Burning reactions.
- Hydro Characters for Bloom: Characters like Barbara, Kokomi, and Xingqiu can provide reliable Hydro application, enabling Bloom and its secondary reactions.
When building a team, consider the synergy between characters and how they contribute to the desired Dendro reactions. This will help you create a team that can handle various combat situations effectively.
Managing Elemental Mastery
Elemental Mastery plays a crucial role in Dendro reactions, affecting the damage output of each reaction. To manage Elemental Mastery effectively, consider the following:
- Elemental Mastery on Key Characters: Equip characters who trigger Dendro reactions with artifacts that boost Elemental Mastery to increase damage.
- Artifacts and Weapons: Use artifact sets like “Wanderer’s Troupe” and “Instructor” to enhance Elemental Mastery. Weapons like the “Sacrificial Series” and “Favonius Series” can also provide Elemental Mastery bonuses.
- Elemental Mastery Thresholds: While there’s no one-size-fits-all approach, aim for at least 100 Elemental Mastery on characters who frequently trigger reactions. Higher levels lead to increased damage bonuses.
By managing Elemental Mastery effectively, you can significantly increase the damage output from Dendro reactions and improve your team’s overall performance in battle.
Read Also: New 5-Star Banner Characters and Order
Conclusion
Dendro reactions have brought a new dimension to combat in “Genshin Impact.”
With the introduction of the Sumeru region, these reactions have become a crucial part of gameplay, allowing players to create unique team compositions and unleash powerful elemental combinations.
From the steady Pyro damage of Burning to the targeted precision of Hyperbloom and the high AoE impact of Burgeon, each Dendro reaction offers unique opportunities for dealing damage and controlling the battlefield.
Understanding the mechanics of Quicken, Aggravate, and Spread can give you a significant edge in combat, allowing you to boost Electro and Dendro damage for critical hits and burst damage.
To fully harness the power of Dendro reactions, focus on building balanced teams that include Dendro characters along with Pyro, Hydro, and Electro allies.
Managing Elemental Mastery is key to maximizing reaction damage, so ensure your characters are equipped with the right artifacts and weapons to enhance these stats.
By incorporating these strategies, you can create a versatile and powerful team capable of handling a variety of combat scenarios in “Genshin Impact.”
Whether you’re exploring the vast world of Teyvat or facing off against challenging bosses in the Spiral Abyss, Dendro reactions can be a game-changer.
With this comprehensive guide, you’re now equipped with the knowledge to understand and utilize Dendro reactions effectively. May your adventures in Sumeru be filled with success and unforgettable battles!
